How to Install an In-Ground Lawn Sprinkler System
BY ALISON HOOVER | AUGUST 10TH, 2022 | BLOGLearning how to install an in-ground lawn sprinkler system is nearly as easy as turning on the water. Home irrigation system kits now come with all the necessary components so you can install a multi-zone system in just two or three days.
Expect to spend around $500 for each zone, depending on the features you choose. Most yards will require 2 or 3 zones for complete coverage. A residential control system will cost between $175 and $200. So you can easily install a 2-zone system for about $1,500.
Here we’ll break down the 9-step process to help you install a lawn sprinkler system.
Contents:
- Tools You’ll Need
- Prep Work for the New Sprinkler System
- Dig the Trenches
- Install the Valve Manifold
- Lay the Pipes
- Install the Sprinkler Heads
- Connect the Water
- Install the Timer and Control System
- Test the Sprinkler and Bury the Pipes
9 Steps for Installing an In-Ground Lawn Sprinkler System
1. Tools You’ll Need
- Safety equipment, including eye and ear protection as well as work gloves.
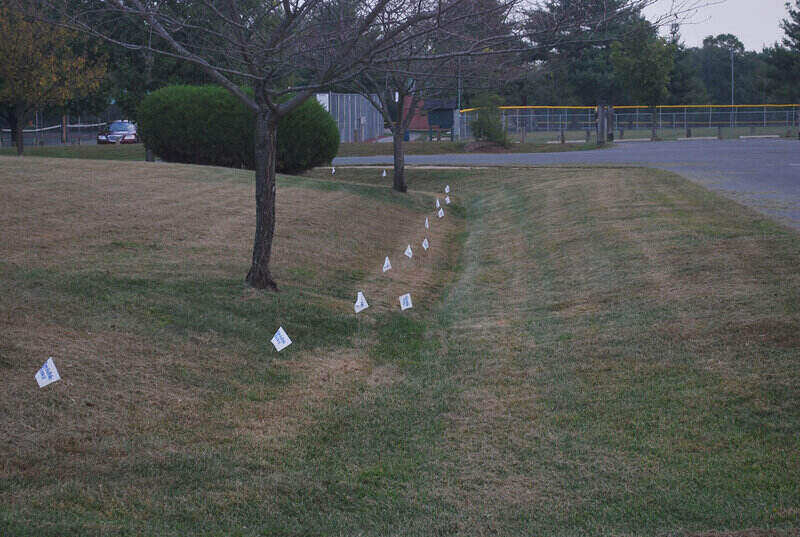
- Stakes, flags, or spray paint to mark the trenches.
- In-ground sprinkler system kit, which includes the sprinkler heads and hardware.
- Control system that pairs with your chosen sprinkler system.
- Trenching machine which you can rent from the home supply store.
2. Prep Work for the New Sprinkler System

- Mark the utilities on your property so you know where you can and cannot dig. If you don’t know where the utilities are, call 811 before you dig.
- Research water usage and learn about any ordinances in your area.
- Create an irrigation map by marking your yard, including any landscaping, sidewalks, and other obstacles. Determine where to place each sprinkler head and where to dig the trench.
- Get any necessary permits that your city or HOA requires.
- Rent a trenching machine from the local home supply store. Consider paying the extra fee for having the trencher delivered and taken away. These machines are heavy.
3. Dig the Trenches
- Mark the trenches you mapped out in step 1 using stakes or flags. Start at the water supply line you’re connecting to.
- Use the trenching machine to dig trenches between 8-12 inches deep and about 4 inches wide. Measure the depth from the top of the pipe to the surface of the soil. If you’d rather dig by hand, use a garden spade with a square edge.
- Make the trenches level
4. Install the Valve Manifold
- Dig a hole just bigger than the manifold.
- Attach the main water supply to the valve box and attach the clamps securely. The valve manifold provides easy access to the valves controlling your system.
5. Lay the Pipes

- Assemble the pipes before placing them in the trenches. Start at the connection spot and work outward from there.
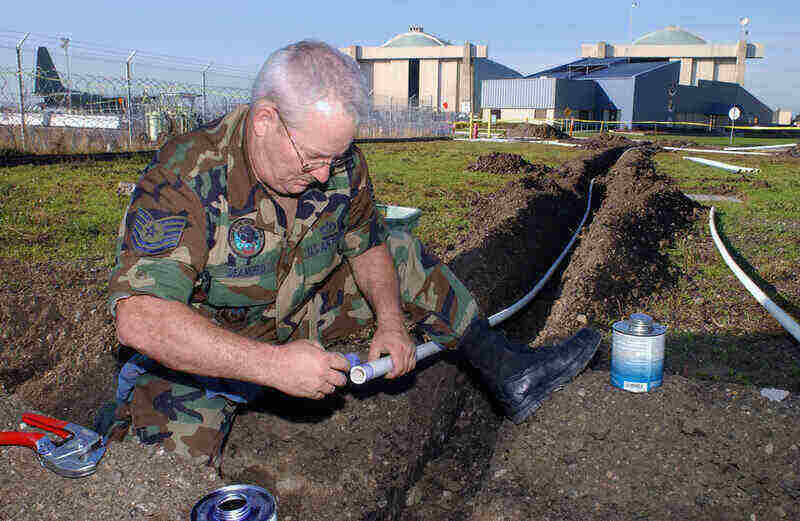
- Cut the PVC piping using a hacksaw or pipe cutter. Smooth the edges with a fine file or knife.
- Connect the pipe to the fitting. Mark the connections with reference lines. This will make it easier and faster once you’ve applied the cement.
- Disconnect the pipe and fitting. Clean the surfaces with a solvent and apply the cement to both the inside of the fitting and the outside of the pipe.
- Connect the pipe and fitting again with the reference marks about a quarter turn apart. Twist the pipe and fitting to align with the reference marks. This ensures the cement spreads properly.
- Work quickly because the cement will begin to set within about 30 seconds. Once the cement sets, the parts cannot be separated.
6. Install the Sprinkler Heads
- Each sprinkler head will connect to the piping via a riser. Place them according to your irrigation map, ensuring proper and complete coverage of your lawn.
7. Connect the Water
Most systems connect to an exterior water supply, much like connecting a garden hose to the valve at the side of the house. You may also be able to use a well or other water source. This can drastically cut down on the cost of running your irrigation system.
- Shut off the water at the meter and then cut into the main line.
- Add a compression tee fitting to control the water flow. Ensure the tee connection and other joints are tight and properly sealed.
- You may want to hire a plumber for this step. Cutting into the main water line can be intimidating if you’re a casual DIY-er.
8. Install the Timer and Control System
A programmable timer allows you to water your lawn regularly, applying the right amount of water at the right times. A watering schedule also keeps your lawn eco-friendly by conserving water, which helps save money.
- Mount the timer on the wall of your house, preferably in the garage. Connect wires from the zone valves to the system box. Follow the instruction manual to ensure proper in-ground sprinkler system installation.
- You may want to consider hiring a professional electrician to complete this step.
9. Test the Sprinkler and Bury the Pipes
- Before filling in the trenches, turn on your system and see how it works. Take the time to look closely at all of the piping, ensuring each connection is secure.
- Turn off the system and fill in the trenches. You may want to sow new grass seed to help your lawn recover.
Lawn Sprinkler System Tips From Our Team
Measure the Water Pressure
You can find the gallons per minute (GPM) average from your city, but for a more accurate measurement, you’ll want to do it yourself. Understanding the water pressure flowing through your system tells you how far each sprinkler head will reach and the amount of time you’ll need to run each zone.
Attach a pressure gauge to the outside spigot to measure the flow rate in pounds per square inch (PSI). For an accurate reading, all of the other faucets on your property should be turned off.
Most homes have a PSI between 40 and 80 PSI. Sprinkler system kits typically require between 30 and 50 PSI. Read the directions carefully to find the proper amount of water pressure for your system.
Choose the Right System
Many different in-ground lawn sprinkler systems are available, including smart systems that allow you to control everything from your phone via Wi-Fi. Research your options and choose the best fit for your yard, water pressure, climate, and lifestyle.
Plan Multiple Zones
If you have large areas to water, you may need to connect multiple zones. This isn’t any more complicated than just one zone. Consider an automatic sprinkler system that rotates through each zone regularly.
Multiple zones will help you care for areas that are shaded, get a lot of sun, are prone to puddling, or have recently been fertilized.
Winterize Your System
In areas where it freezes in winter, you need to drain the system each autumn. This prevents freeze damage to the pipes, sprinklers, and valves. Winterizing can be a DIY job, but it might be best to hire a professional if this is your first in-ground sprinkler system.
FAQ about Installing a Lawn Sprinkler System
1. What kind of piping should I use?
Most people use PVC pipes, but polyethylene is another option. Polyethylene pipes are flexible and well suited to colder climates with frequent freezes.
2. How do I know what size piping to use?
The system’s piping must match the supply line. You can wrap a piece of string around the supply line to measure its size.
3. Do I need backflow prevention?
Some municipalities require backflow preventers, but it’s a good idea in all areas. Backflow prevention protects the main water supply from chemicals that may enter the system from your yard.
4. What do I do if a sprinkler head isn’t working?
First, check to see if the sprinkler head is clogged. If it’s free of debris, you might need to replace it. The good news is that it is pretty simple to replace a malfunctioning head.
5. Will a pop-up system work for my flower beds?
Yes, but you should consider adding a drip irrigation system around flower beds. This will provide a more consistent and gentle watering system than an in-ground sprinkler system.
If installing a lawn sprinkler system is a bit over your head, we can help you find a landscaping professional.
Main photo credit: Brenda Stuart | Wikilawn