DIY Hydroseeding: How to Hydroseed Your Own Lawn in 11 Steps
BY JANINE CAAYAO | AUGUST 7TH, 2023 | BLOG, LAWN CARE
Are you looking for a more efficient and cost-effective way to grow a new lawn? Hydroseeding is cheaper than laying sod and more convenient than hand-seeding; as a bonus, it grows faster, too! If you’re ready to get your hands a little dirty, you could hydroseed your own lawn instead of hiring a professional. DIY hydroseeding isn’t too complicated. Let’s go over the steps.
- What is Hydroseeding?
- DIY Hydroseeding Tools
- Step 1: Select Your Seeds and Mulch
- Step 2: Test Your Soil
- Step 3: Clear Your Lawn
- Step 4: Mark Any Sprinkler Heads
- Step 5: Grade Your Soil
- Step 6: Add Topsoil and Other Soil Additives
- Step 7: Level Your Lawn
- Step 8: Prepare the Hydroseeder
- Step 9: Prepare the Slurry
- Step 10: Fill the Hydroseeder
- Step 11: Spray the Hydroseeding Slurry
- Maintaining Your Hydroseeded Lawn
- FAQ
What is Hydroseeding?
Also called hydraulic mulch seeding, hydroseeding is simply the process of seeding with a slurry mixture of seeds, water, mulch, and fertilizer. It has a slew of benefits, such as faster seed germination and a more uniform look.
The slurry is sprayed with hydroseeding equipment or a pump. You can also buy a do-it-yourself hydroseeding kit that comes with the slurry ingredients and its own sprayer.
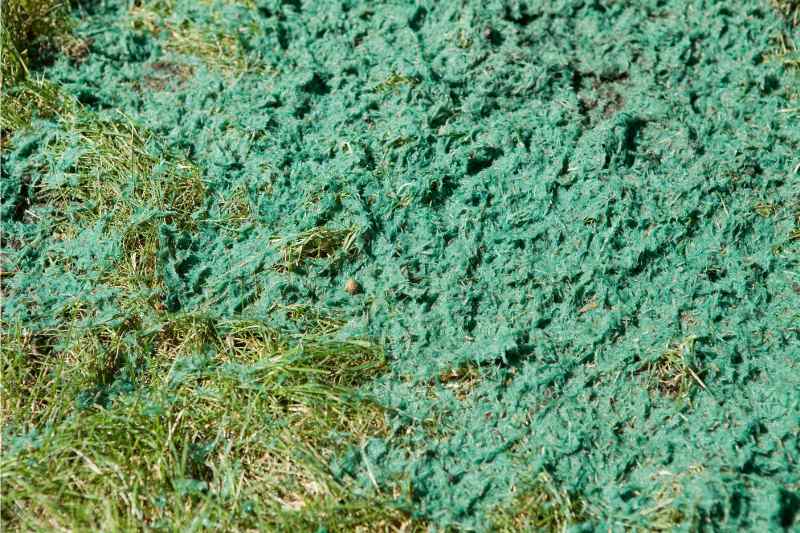
Photo Credit: BanksPhotos / Canva Pro / License
DIY Hydroseeding Tools
You need the following tools and materials for your hydroseeding project:
- Soil test (at-home kit or sample collection kit from a lab)
- Hydroseed slurry materials (if not using a ready-to-spray hydroseeding kit)
- Grass seeds
- Water
- Mulch
- Fertilizer
- Green dye (optional, but recommended)
- Tackifier (optional, but recommended for steep slopes)
- Hydroseeding equipment (hydroseeding machine or DIY hydroseeder)
- Rake and yard leveler
- Topsoil
- Compost
- Sulfur or lime (optional)
- Protective equipment (sun protection, garden gloves, close-toed shoes, face protection, etc.)
Step 1: Select Your Seeds and Mulch

Photo Credit: artursfoto / Canva Pro / License
The very first step is planning out the specifics of your hydroseed slurry: the types of seeds you want to plant and the mulch that you’ll be using.
It’s recommended to seed grass types that match your area’s climate: cool-season grasses for the North and warm-season grasses down South. With hydroseeding, you can plant multiple types of grass instead of just one. Some people blend Kentucky bluegrass with tall fescue, for example.
There are many types of mulch that homeowners can use in their hydroseed slurries. Each one has its own pros and cons. Here are some of these mulch types:
- Paper mulch – most affordable, but not as effective
- Wood fiber mulch – expensive but quite effective
- Blended mulch – mixes paper and wood fiber mulch to get the benefits of the latter at a lower cost
- Bonded fiber matrix mulch – used for steep slopes and areas with heavy soil erosion
Step 2: Test Your Soil
Finding out the condition of your soil before you plant new seeds is a good move; it will tell you if the soil needs any amendments to ensure the most optimal growing conditions for your new grass. A soil test — either from a lab or from a home testing kit — will tell you your soil’s pH level and what nutrients it has.
Grass grows best in the pH range of 6.0 to 7.0. You can add lime if your soil is too acidic; add sulfur if it’s too alkaline. Any number outside of this pH range can cause your grass to grow poorly or even die.
Using the soil test results, you can also determine what fertilizer to add to your hydroseed slurry.
Step 3: Clear Your Lawn
Now it’s time to prepare your lawn for hydroseeding. The first step is clearing your lawn, as hydroseeding is most successful when applied to bare soil. Clear your lawn of existing grass (dead or alive), old plants, weeds, rocks, tools, toys, and other debris.
Step 4: Mark Any Sprinkler Heads
Next, you should mark any sprinkler heads around your lawn. This is especially important if you’re lugging around a heavy hydroseeding machine.
If you don’t have a sprinkler system but want to install one, you should do it while you’re prepping your lawn and before spraying the slurry.
Step 5: Grade Your Soil

Photo Credit: JulNichols / Canva Pro / License
Grading the soil is simply the process of adjusting its slope to prevent rainwater and runoff from getting to your house and other structures. When grading soil, it also gets leveled.
To prepare your lawn for hydroseeding, grade your soil 2 ½ to 3 inches below the final grade you want it to be. The final grade is how high you want your lawn to be. Afterward, fill in holes and level your lawn with a rake and/or a yard leveler.
Step 6: Add Topsoil and Other Soil Additives
The next step is adding your soil additives: topsoil, compost, and sulfur or lime (if needed). The first two components stimulate healthy grass growth mainly because they supply your growing grass with nutrients.
Add enough topsoil and compost so that it adds about 3 inches to your lawn’s grade. Then, churn it into the existing soil.
Step 7: Level Your Lawn
Finally, it’s time to re-grade and level your lawn to the final grade you want it to have. It’s now ready to be hydroseeded!
Step 8: Prepare the Hydroseeder
Do you have a hydroseeder? Chances are that the average homeowner doesn’t have one. In that case, you have three options: renting a hydroseeder, making one yourself, or buying a hydroseeding kit in-store or online. Buying a hydroseeding kit is not a bad option if you need to seed a smaller area.
You can rent a hydroseeding machine for covering large areas from equipment rental companies like United Rentals, Sunbelt Rentals, and MacAllister Rentals.
If you’d rather make your own hydroseeder, this video tutorial will show you how:
Once you have your hydroseeding equipment, it’s time to mix your slurry. If you have a DIY hydroseeding kit, you only need to read the instructions.
Step 9: Prepare the Slurry
How much of each slurry component you need depends heavily on the size of the area you’ll be spraying. Typically, you’ll need 5 to 7 lbs of seed, 40 to 50 lbs of mulch, and 20 lbs of fertilizer for every 1,000 sq. ft. you’ll be hydroseeding. You’ll need enough water to fill your equipment about ¾ of the way. When in doubt, ask your materials supplier for guidance.
Step 10: Fill the Hydroseeder
Hydroseeding machines can vary in how they’re operated; always read the manual for specific instructions. However, you can expect this general process:
- Fill your hydroseeder with water and let it run for 30 seconds.
- Add your hydroseed slurry ingredients.
- Let the ingredients combine until there are no more clumps in the hydroseed mixture.
Step 11: Spray the Hydroseeding Slurry
Now, it’s time to spray your lawn. It’s best to spray when it’s calm and cool outside, but it’s ok if it’s predicted to rain lightly that day. Wear your protective equipment before spraying, as you might be out in the sun for a while.
Plan your path ahead of time to prevent you from having to step on the areas you’ve just sprayed. Keep the nozzle at least 3 inches from the ground and spray slowly and evenly throughout your lawn.
You might want to overlap your slurry a little bit while you spray. This ensures there aren’t any gaps that will result in bare patches later on. You can make this easier for yourself if you add lawn-friendly dye to your slurry.
Maintaining Your Hydroseeded Lawn
Photo Credit: Sue Thompson / Flickr / CC BY-ND 2.0
Congratulations, you’ve now hydroseeded your lawn! However, this is only the beginning. You’ll need to maintain your new grass for it to grow into a healthy lawn.
Here are a few hydroseeded lawn maintenance tips:
- Keep your lawn moist. Water your lawn twice or thrice daily in short bursts for 4 to 6 weeks. Slowly reduce the amount of water afterward over the course of a few more weeks.
- Avoid walking on your lawn until it’s fully established. Minimize foot traffic for about a month, but it’s better to wait five weeks before stepping on your lawn.
- Mow your lawn once your new grass is 3 to 4 inches tall; this will take around 4 to 6 weeks before you can mow your lawn.
- Add lawn fertilizer about 30 days after hydroseeding your lawn. This will give your turf the extra nutrients it needs and will promote good grass growth.
- Hand-weed if necessary. Ideally, you should deal with weeds before hydroseeding. Don’t use any weed killers until the grass is 3 to 4 months old.
FAQ About DIY Hydroseeding
What time of year should you hydroseed?
Just like when you’re planting grass seeds the old-fashioned way, the best time to hydroseed is during your chosen grass type’s growing season.
For Bermudagrass, Bahiagrass, and other warm-season grasses, you should hydroseed in late spring or early summer.
Kentucky bluegrass, ryegrasses, and other cool-season grasses should be hydroseeded from late summer to early fall.
While you can hydroseed in the summer, it can be a bit more challenging as you must keep your new lawn moist for the first few weeks, and water tends to evaporate in the hot summer sun before it can soak into the soil and reach the grass’s roots.
Should you hydroseed or overseed?
If you want to grow new grass in a larger area, then you should hydroseed. If you’re filling in bare patches, then it’s better to overseed the regular way. The hydroseed slurry can injure or kill your existing grass.
How much does professional hydroseeding cost?
On average, the cost of professional hydroseeding ranges from 8 to 20 cents per square foot. The rate will depend on many factors, including your lawn’s condition and how big it is.
DIY Hydroseeding vs. Hiring a Pro
DIY hydroseeding isn’t too complicated and can make for an interesting project to tackle. You could save money on labor, too. However, it can be more beneficial to hire a professional because they have the knowledge and the equipment to hydroseed your lawn already. Besides, a pro will usually be more successful at hydroseeding than the average homeowner.
Wikilawn can connect you with dependable lawn care pros that can hydroseed, fertilize, and mow your lawn for you. Hire a lawn maintenance pro near you today for a lush lawn without all the work.
Main Image Credit: BanksPhotos / Canva Pro / License