What is Hydroseeding?
BY JANINE CAAYAO | AUGUST 7TH, 2023 | BLOG, LAWN CAREStarting a new lawn from scratch may seem daunting. Seeding takes effort and takes a while to show results; laying sod, on the other hand, is instant but expensive. Well, let us introduce you to a third option: hydroseeding, also called hydraulic mulch seeding.
In this article:
- Hydroseeding Explained
- Hydroseeding vs. Other Seeding Methods
- When and How to Hydroseed DIY
- Professional Hydroseeding Cost
- FAQ
Hydroseeding Explained
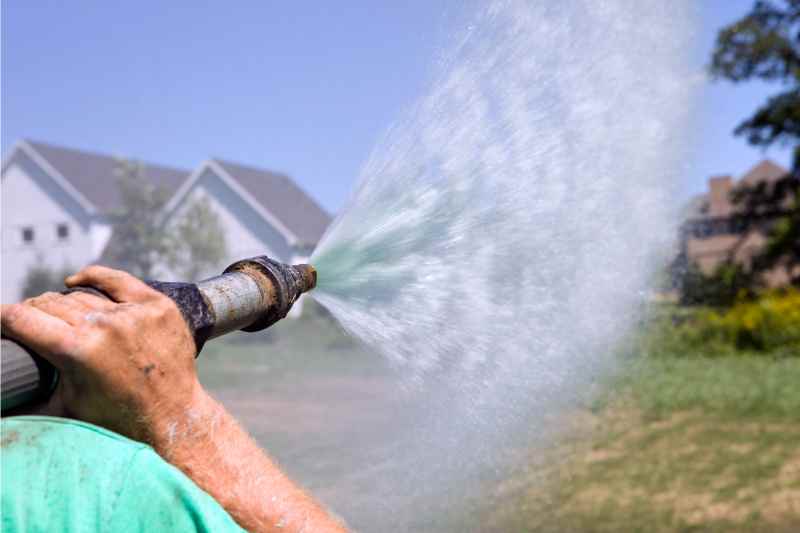
Hydroseeding is pretty straightforward: It’s just the process of seeding an area using a slurry. This slurry is composed primarily of water, seeds, mulch, and fertilizer, but some hydroseed mixtures also include lawn-friendly dye and a tackifier. Here’s what each slurry component brings to the table.
Water
Water is the main component and what makes the hydroseed mixture fluid enough to be a sprayable slurry (it’s also where the “hydro” comes from). When mixed with mulch, the slurry becomes denser, heavier, and sticky, helping the slurry stick to the soil. The abundant water also makes the seeds germinate and grow faster compared to those that were hand-seeded.
Seeds
One of the advantages of hydroseeding is that you can pick and choose what types of grass seeds you want to include in your hydroseed slurry. With sod, you can only typically use one type of turf.
While many hydroseeding slurries use grass seeds, you can also use the seeds of different types of plants. Some hydroseed projects use wildflower seeds, for example.
Mulch

Photo Credit: christina rutz / Flickr / CC BY 2.0
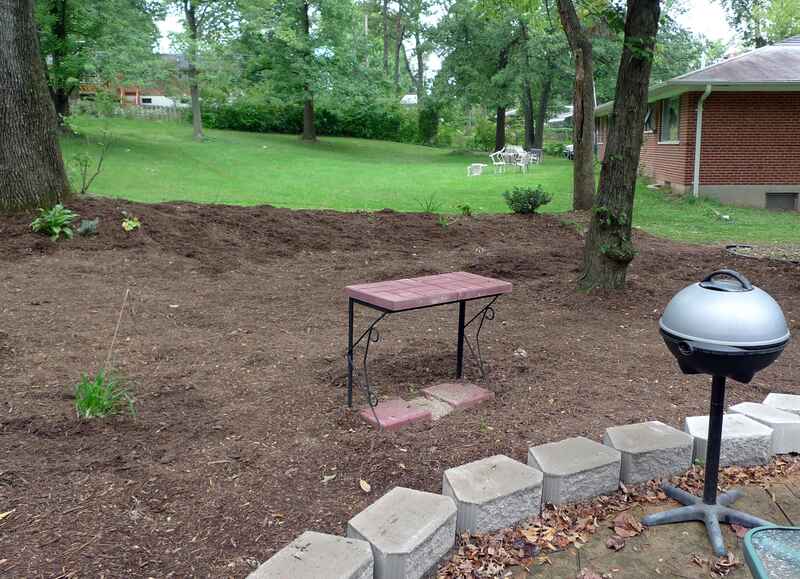
When mixed with water, mulch helps seeds stick to the soil. It also has other functions, mainly protecting seeds from the elements like wind, sunlight, and temperature fluctuations. Mulch also nourishes the growing grass seedlings as it starts decomposing.
Hydroseed slurries can use a variety of mulches with different levels of effectiveness. Here are some of them:
- Paper mulch is the least durable type of mulch, but it’s the most affordable material out there. Homeowners probably shouldn’t use this when seeding large areas.
- Wood fiber mulch, in comparison, is the most effective mulching material. It’s heavy and sturdy, which keeps the grass seeds in place and protects them. It’s also the most expensive mulching material.
- Blended mulch mixes paper and wood fiber mulch to create an effective mulch that’s more cost-effective than pure wood fiber. Typically, it’s a blend of 30% to 40% paper mulch and 60% to 70% wood fiber mulch.
- Bonded fiber matrix mulch contains a bonding agent that holds up against water well, giving the slurry more grip. It’s usually used when seeding steep slopes and high erosion areas.
Fertilizer
The last crucial component of a hydroseed slurry is the fertilizer. It contains nutrients that will feed your new grass as it grows to become a healthy lawn. The fertilizer typically doesn’t last throughout the growing period, so it’s a good idea to fertilize your new lawn again later on.
Dye
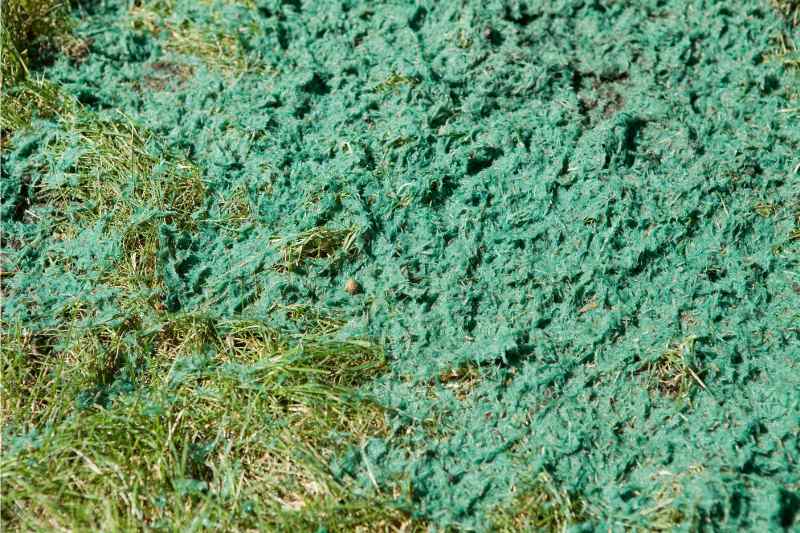
For the best results, the hydroseed slurry should be sprayed evenly across bare soil. A lawn-friendly dye helps show where the slurry has already been sprayed to ensure even coverage. This component is optional, though.
Tackifier
Is the area you’re hydroseeding prone to soil erosion and runoff? Your hydroseed mixture might need a tackifier, which is a binding agent that helps the slurry stick to the soil. Typically, flat lawns don’t need a tackifier, as there’s little erosion risk.
Hydroseeding vs. Other Seeding Methods

Photo Credit: BanksPhotos / Canva Pro / License
So what makes hydroseeding a great seeding method? Here are some benefits of hydroseeding and hydroseeded lawns:
- You can pick and choose what grass seeds to use in your slurry.
- It results in a more uniform lawn than other seeding methods.
- It’s a soil erosion solution.
- Hydroseed is more cost-effective than sod and more convenient than traditional hand-seeding, especially if you’re working with larger areas.
- You’ll have visible results faster than traditional seeding.
However, hydroseeding is not perfect. Here are some disadvantages of hydroseeding:
- Hydroseeded lawns need a lot of water for the first few weeks.
- They’re harder to establish on steep slopes unless you use a tackifier.
- DIY hydroseeding is less effective and more complicated than other DIY seeding methods; it’s better to go with a professional.
Hydroseeding vs. Sod
The most enticing aspect of sod is how it gives you a beautiful lawn very fast; after a short waiting period, you’ll be able to walk on your new lawn. Laying sod has a few disadvantages, though. It can look artificial, and it’s typically less hardy than a hydroseeded or traditionally-seeded lawn. It’s also more expensive to boot.
If you can get past the wait time, hydroseeding seems like the better option, and not just because of the lower price tag. Although it takes a while to grow, seeded lawns (including hydroseeded lawns) are hardier and more disease-resistant than sod because they have stronger root systems. Hydroseed also offers more customization and looks more natural than sod.
However, hydroseeded lawns are more delicate while they’re growing. They need a lot of water and can’t be walked on for about 5 weeks. Since you’re growing grass from seed, you also can’t hydroseed outside of your turf’s growing season, while you can install sod at any time of year.
Hydroseeding vs. Traditional Seeding
Traditional seeding is the cheapest seeding method and is as customizable as hydroseeding; however, it has a whole slew of disadvantages that may deter you from hand-seeding your lawn. Hand-seeding takes longer, and traditionally seeded lawns take longer to germinate. It may even grow patchy, requiring more work for your lawn to look uniform.
Hydroseeding is more expensive and uses more water, but it’s more convenient. Hydroseeded lawns also sprout faster and tend to grow more uniformly than traditionally seeded lawns.
When and How to Hydroseed DIY

Photo Credit: BanksPhotos / Canva Pro / License
The best time to hydroseed is the same as if you were hand-seeding; always hydroseed during the turf’s growing season. Warm-season grasses like Bermudagrass and Bahiagrass should be hydroseeded in late spring or early summer, while cool-season grasses like Kentucky bluegrass and fescues should be hydroseeded in late summer or early fall.
Let’s compare hydroseeding in the spring, fall, and summer:
- Spring is usually rainier, so you won’t need to water your lawn as often. Just make sure that the threat of frost is gone before hydroseeding.
- Fall hydroseeding is safe as long as you do it no later than 45 days before the predicted date of the first frost in your area.
- Summer hydroseeding is possible, but it can be more difficult. Summer is hotter, so your lawn will dry out faster. Keeping your hydroseeded lawn moist throughout this time of year will require more water.
Now that you know the best time to hydroseed, it’s time to learn how the hydroseed process works. If you ever want to hydroseed your lawn DIY, here is a short step-by-step guide:
- Select seeds.
- Perform soil test.
- Clean up your yard.
- Mark sprinkler heads.
- Grade soil 2 ½ to 3 inches below the desired grade.
- Add topsoil, compost, and soil additives (if needed).
- Re-grade soil.
- Prepare slurry and hydroseeding equipment.
- Spray.
For a more in-depth look at hydroseeding your own lawn, you can read our complete guide to DIY hydroseeding.
Maintaining your new hydroseed lawn is important in ensuring success. Here’s how to maintain your hydroseeded lawn:
- Keep your lawn moist. Water your lawn twice or thrice daily in short bursts for 4 to 6 weeks. Slowly reduce the amount of water afterward for a few more weeks.
- Avoid walking on your lawn until it’s fully established. Minimize foot traffic for about a month, but it’s better to wait five weeks before stepping on your lawn.
- Mow your lawn once your new grass is 3 to 4 inches tall; this will take around 4 to 6 weeks before you can mow your lawn for the first time.
- Add starter fertilizer about 30 days after hydroseeding your lawn. This will give your turf the extra nutrients it needs and will promote good grass growth.
Professional Hydroseeding Cost
The cost of professional hydroseeding depends on many factors, such as the condition of your lawn and how big it is. However, homeowners can typically expect hydroseeding to cost an average of 8 to 20 cents per square foot. A 3,000 sq. ft. lawn would cost anywhere from $240 to $600 to be hydroseeded.
Professionals will typically charge a discounted rate if you’re hydroseeding by the acre. Rates can also vary drastically depending on where you live in the US.
FAQ About Hydroseeding
How long should you water your hydroseeded lawn?
When watering your hydroseeded lawn, make sure not to run your sprinklers for more than 15 minutes. Otherwise, you might overwater your lawn.
What happens if you walk on hydroseed?
Walking on your new hydroseeded lawn before it’s established can form bare spots.
When can you use weed control products on your hydroseeded lawn?
Wait for at least 3 to 4 months before using weed control products on your hydroseed lawn. Make sure to get rid of weeds before starting your hydroseed project. In case you find any weeds, you can try hand-pulling them.
Can you hydroseed over existing grass?
It’s generally not recommended to do so, but you can. It’s just not a good idea because the hydroseed slurry can kill your existing grass. Try overseeding instead if you want to fill out bare patches in your lawn.
Get the Lush Lawn of Your Dreams
Hydroseeding is a good option to consider if you want to grow a new lawn relatively quickly without breaking the bank. It’s more cost-effective than laying sod, more efficient than traditional seeding, and isn’t too difficult to DIY. But why risk hydroseeding your lawn yourself when you can hire a professional lawn care service instead?
Wikilawn can help you find a lawn care pro near you to help you with hydroseeding and your other lawn care needs, including regular maintenance.
Main Image Credit: Sue Thompson / Flickr / CC BY-ND 2.0